SSH keys
Latitude.sh allows you to deploy servers using SSH keys.
SSH is extremely easy to get started and provides a secure way of logging into your servers. Here you can learn what SSH is, how it works, and how to create SSH keys on Windows, Linux, and macOS.
If you're already comfortable with SSH, head to Adding your SSH key .
What is SSH
SSH is a remote administration protocol that allows users to control and modify their servers remotely. SSH uses cryptographic techniques to ensure that all communication to and from the remote server happens in an encrypted manner.
It provides a mechanism for authenticating a user, transferring inputs from the client to the host, and relaying the output back to the client.
Any Linux or Mac user can SSH into their remote server directly from the terminal window.
How does SSH work
Linux or Mac enables you to use SSH clients straight from the terminal window. If you use Windows, you will need to download an SSH client to open SSH connections. The most popular SSH client is PuTTY.
The SSH command consists of three distinct parts:
ssh {user}@{host}
The SSH key command instructs your system that you want to open an encrypted Secure Shell Connection. {user} represents the account you want to access.
For example, you may want to access the root user, which is basically synonymous for system administrator with complete rights to modify anything on the system. {host} refers to the computer you want to access. This can be an IP Address or a domain name (e.g. www.xyzdomain.com).
When you hit enter, you will be prompted to enter the password for the requested account. When you type it in, nothing will appear on the screen, but your password is, in fact being transmitted. Once you’re done typing, hit enter once again. If your password is correct, you will be greeted with a remote terminal window.
You can read more about SSH commands here.
On Windows
You can create SSH keys in many ways. Windows requires an SSH client but doesn’t have a default SSH client on their operating system. The easiest way we think is to generate SSH Keys using PuttY.
- Download PuttY. The two binaries you will need are:
- PuTTY (the SSH and Telnet client itself)
- PuTTYgen (an RSA and DSA key generation utility)
- Open the PuTTYgen program.
- For the Type of key to generate, select SSH-2 RSA.
- Click the Generate button.
- Type a passphrase in the Key passphrase field. Type the same passphrase in the Confirm passphrase field. You can use a key without a passphrase, but this is not recommended.
- Click the Save private key button to save the private key. Important: Never share your private key with anyone.
- Copy the contents under Public key for pasting into OpenSSH authorized_keys file.
- Save the contents you just copied somewhere. This is the public key you're going to use with Latitude.sh and any other services you'd like to connect with SSH. You can save it as a .txt file in order to be able to open it with a text file later.
On Linux & macOS
When you generate the keys, you will use ssh-keygen to store the keys in a safe location so you can bypass the login prompt when connecting to your instances.
- Open a Terminal window.
- Enter the following command:
ssh-keygen -t rsa. This starts the key generation process. When you execute this command, thessh-keygenutility prompts you to indicate where to store the key. - Press the ENTER key to accept the default location. The
ssh-keygenutility prompts you for a passphrase. - Type in a passphrase. You can also hit the ENTER key to accept the default (no passphrase). However, this is not recommended. You will need to enter the passphrase a second time to continue.
- After you confirm the passphrase, the system generates the key pair
Your identification has been saved in /Users/myname/.ssh/id_rsa.
Your public key has been saved in /Users/myname/.ssh/id_rsa.pub.
The key fingerprint is:
ae:89:72:0b:85:da:5a:f4:7c:1f:c2:43:fd:c6:44:38 [email protected]
The key's randomart image is:
+--[ RSA 2048]----+
|                 |
|         .       |
|        E .      |
|   .   . o       |
|  o . . S .      |
| + + o . +       |
|. + o = o +      |
| o...o * o       |
|.  oo.o .        |
+-----------------+
Your private key is saved to the id_rsa file in the .ssh directory. Never share your private key with anyone.
Your public key is saved to the id_rsa.pub file and is the key you upload to your Latitude.sh account. You can save this key to the clipboard by running this:
pbcopy < ~/.ssh/id_rsa.pub
Now continue to SSH Key Access to learn how to import your recently generated SSH key to Latitude.sh.
Adding your SSH Key
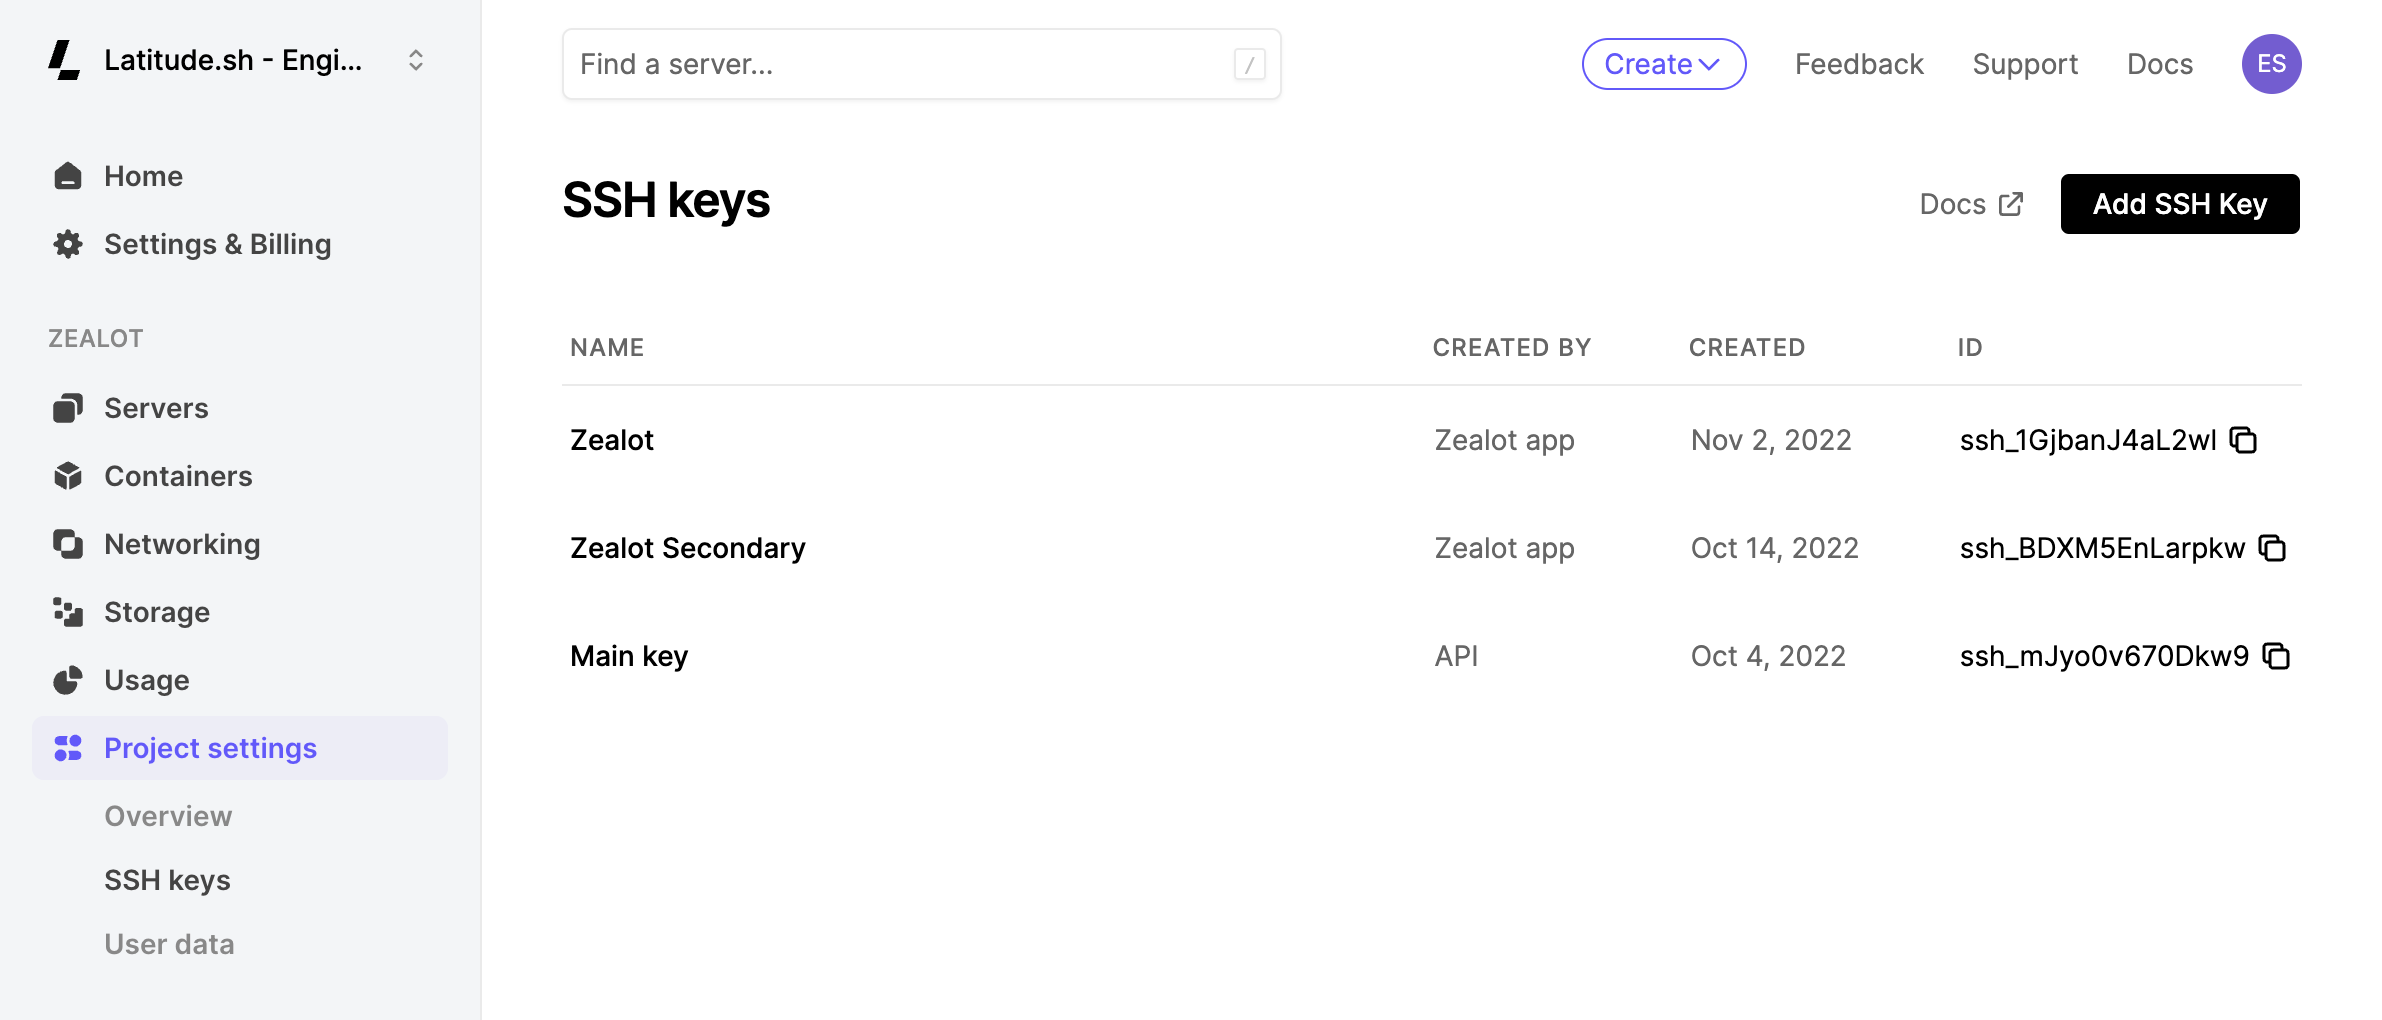
If you already have an SSH key pair, you can use it to import it into your Latitude.sh project. Go to the Project settings page and click on SSH keys in the sidebar

You can reach the project settings page by clicking on Project Settings on the sidebar.
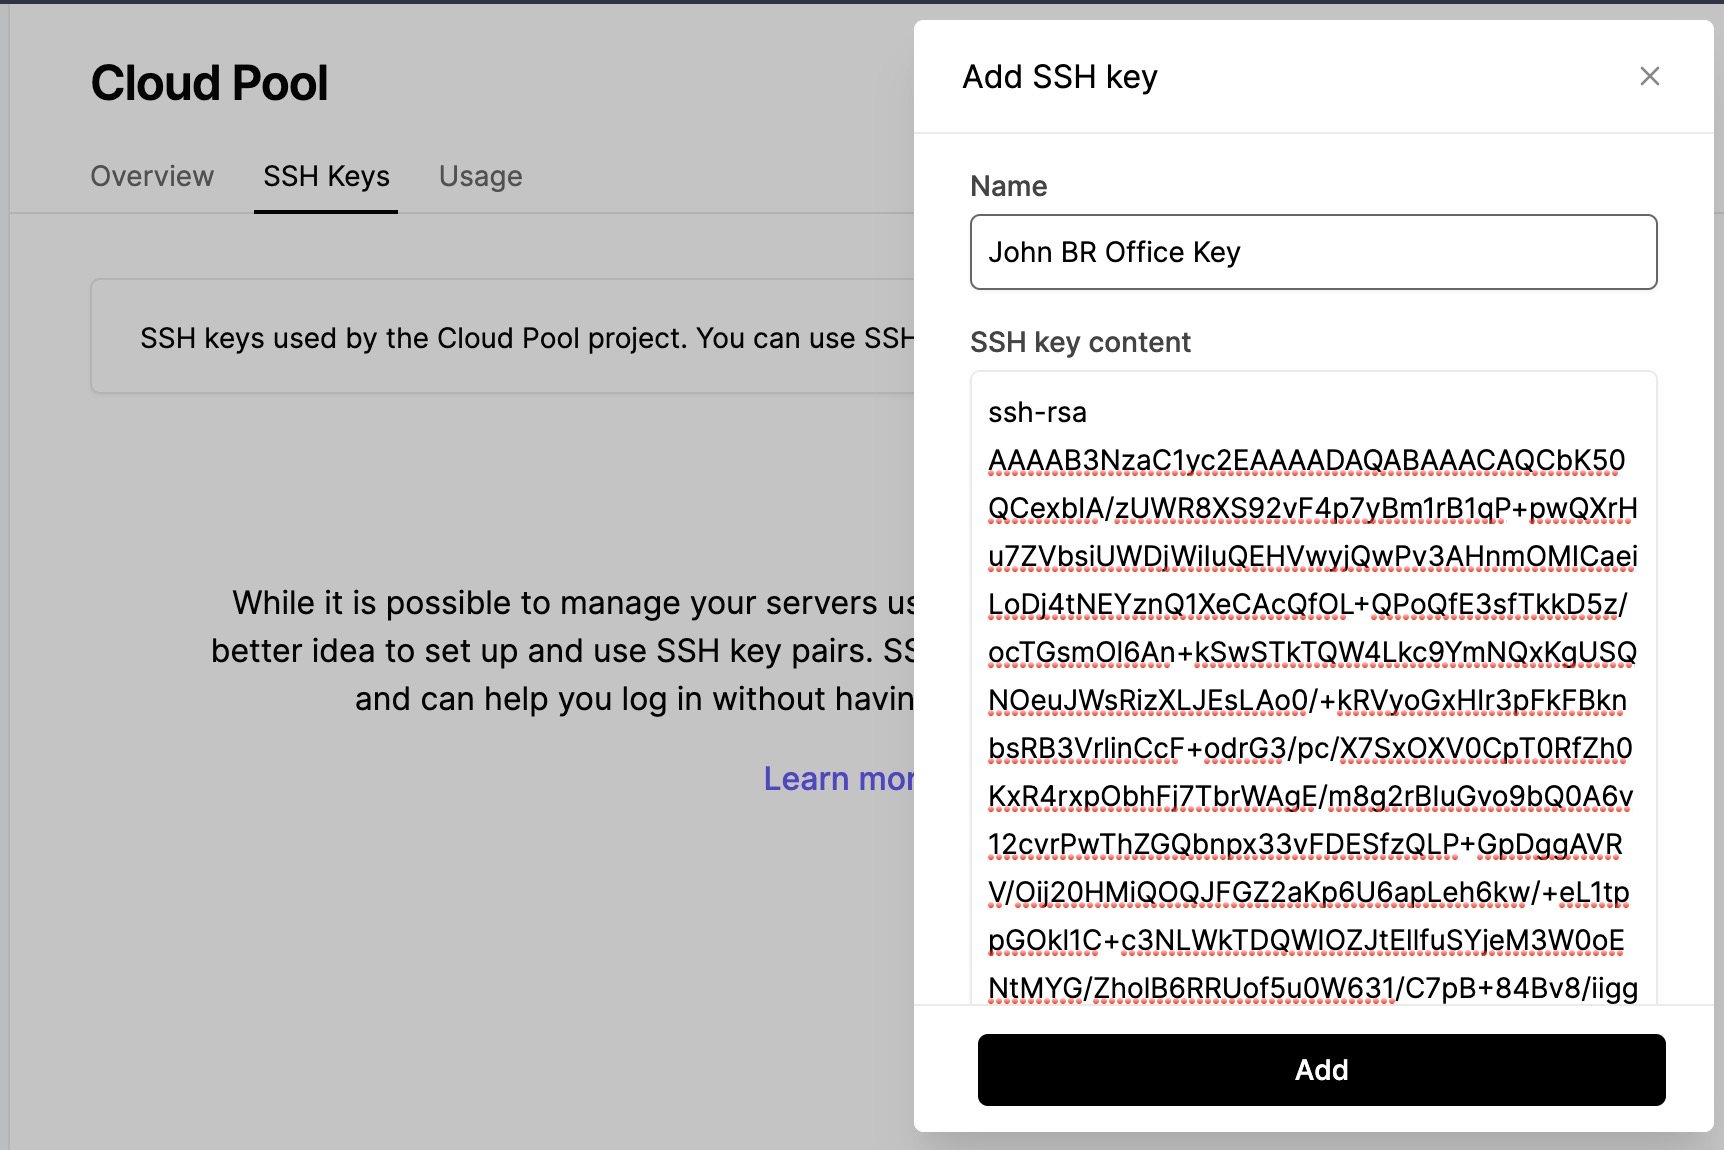
- Click on Add SSH Key, paste your Public SSH Key, and choose a name for it. The name is only used to help you easily identify the key afterward. It's recommended you use your e-mail as part of the key name as all users of your account will have access to the imported keys.

Adding an SSH key
- Click on *Add and the key will be ready to use when deploying or reinstalling a server.
There's no limit to the number of keys you can add and use with your servers.
Using your SSH key
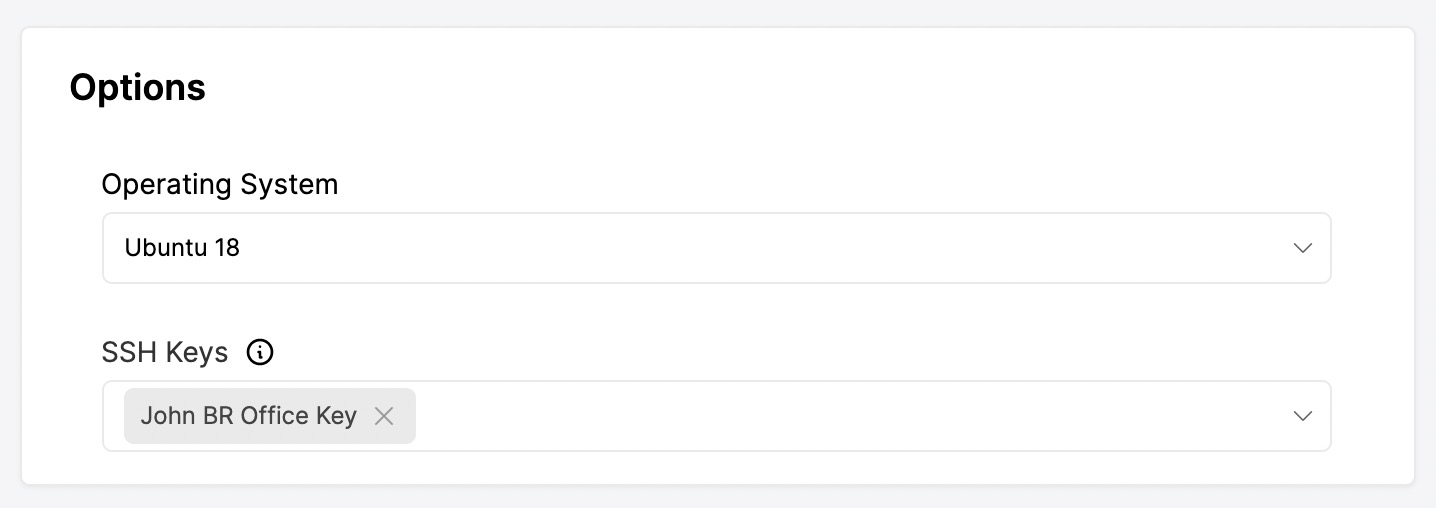
When deploying or reinstalling servers, you'll have the option to select the SSH Keys previously added. You can deploy with as many keys as you want.

Select the keys you want to use when creating a new server or reinstalling an existing one.
When you deploy with an SSH key, Latitude.sh does not disable password login.
Updated 5 months ago
